| Return | General | Console | Combinations | Recordings | Demo | Gallery | Settings |


|
Settings
After installation, Napo is configured to let all manuals respond to note on/off messages on MIDI channels 1-4. Of course this does not make much sense for apps with more than one manual and if you have more than one MIDI keyboard. Then you need to adapt the MIDI configuration to your needs. This, and many other things, can be done in the Settings view.
At the right top of this view there is a button which opens an action menu:
This action menu offers the following entries:
- About the App: Displays the app version, the framework version and background information like the origin of the sample set and license notes.
- View in App Store: Shows the page of the app in the App Store.
- Visit Support Page: Opens Safari and navigates to the support web page of the app.
- Show Napo User Manual: Opens Safari and shows the Napo oneline user manual, i.e. the web pages that you are reading right now.
- Importing Samples: This entry is new in Napo 5.9. The importing of samples is explained here.
- Launchpad Configuration: This entry is of interest only if you would like to use a Novation Launchpad for controlling the organ app. The corresponding functions are explained here.
- Reset Settings: Resets all settings to their factory values.
The Settings view is split into several thematic views and an additional view where you can load and save the settings. These subviews can be selected by tapping the buttons that sit above the main icon bar:
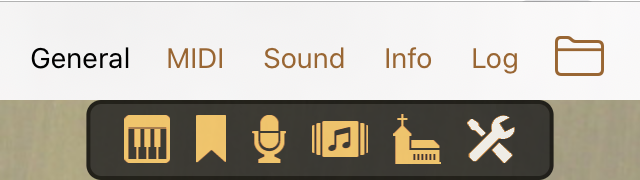
There are currently the following subviews:
| General | In this view, you can configure the appearance of the Console view and behaviour like the transposing functionality and support for various types of MIDI communication. |
| MIDI | This view serves for setting the MIDI channels for the keyboards, MIDI controllers for volume sliders or swell pedals, and MIDI messages to control stops, tremulants, couplers and other functions. |
| Sound | Use this view to set the audio buffer size, the handling of overdrive situations and the reverb. |
| Info | This view shows information about disk space and sample files. |
| Log | This button does not represemt a view like the others, but it opens the log display that is described in General Remarks. |
| Save/Load | This view, symbolised by a folder icon, is for managing saved settings. Saving and loading settings can be useful for example if you happen to operate the app with different MIDI consoles. |
In the following we give a short description of the subviews, their sections and the particular settings.
General – Appearance ↑
These settings define the look and operation of the Console view:
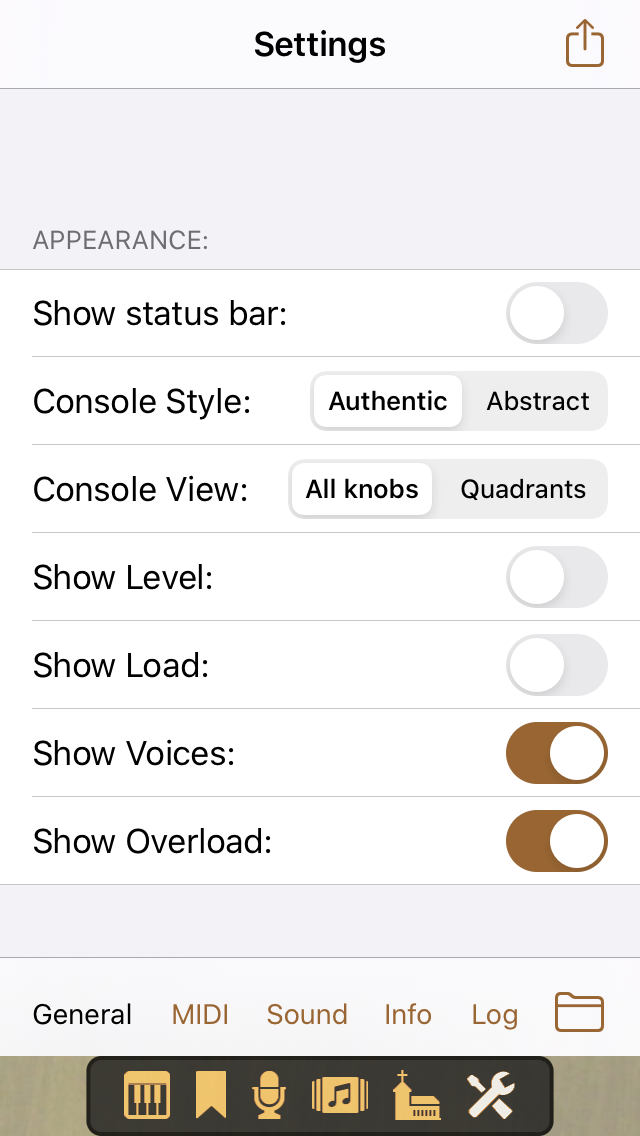
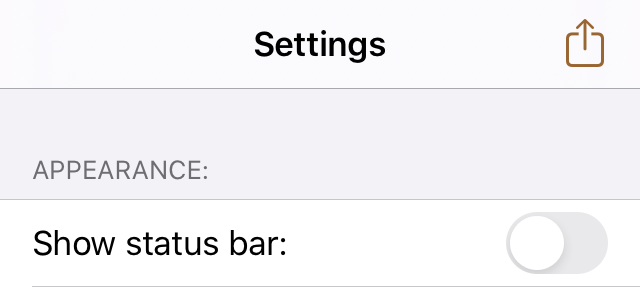
- Show Status Bar: This switch is there only in the iOS version. Using it, you can hide the iOS status bar, to get some extra space for the other screen elements.
- Console Style: Here you can select the display style of the Console view. Authentic means that the Console view tries to mimic the real console, while Abstract is optimised for ease of use. You will see the changed style when you return to the Console view. The switching can also be done in the Console view by long-tapping the Console symbol.
- Console View: This switch, too, is there only in the iOS version. It controls whether the Console view should show all elements or only a single quadrant. The quadrant display is useful for the tight screen space of an iPhone or iPod touch. The switching can also be done in the Console view by long-tapping the Console symbol or by pinch gestures.
- Show Level: Here you can configure if you would like the audio level to be displayed in the background of the volume slider.
- Show Load: If this switch is set, then the current load of the device will be displayed in the background of the icon bar. With increasing load, this bar grows to the right where it changes from green to orange to red. Red means that you operate the device at overload and risk stuttering sound.
- Show Voices: If this switch is set, then the number of playing voices will be displayed at the bottom right (if there are any playing voices).
- Show Overload: If this switch is set, then CPU, I/O and Reverb overload conditions are signalled by yellow warning triangles.
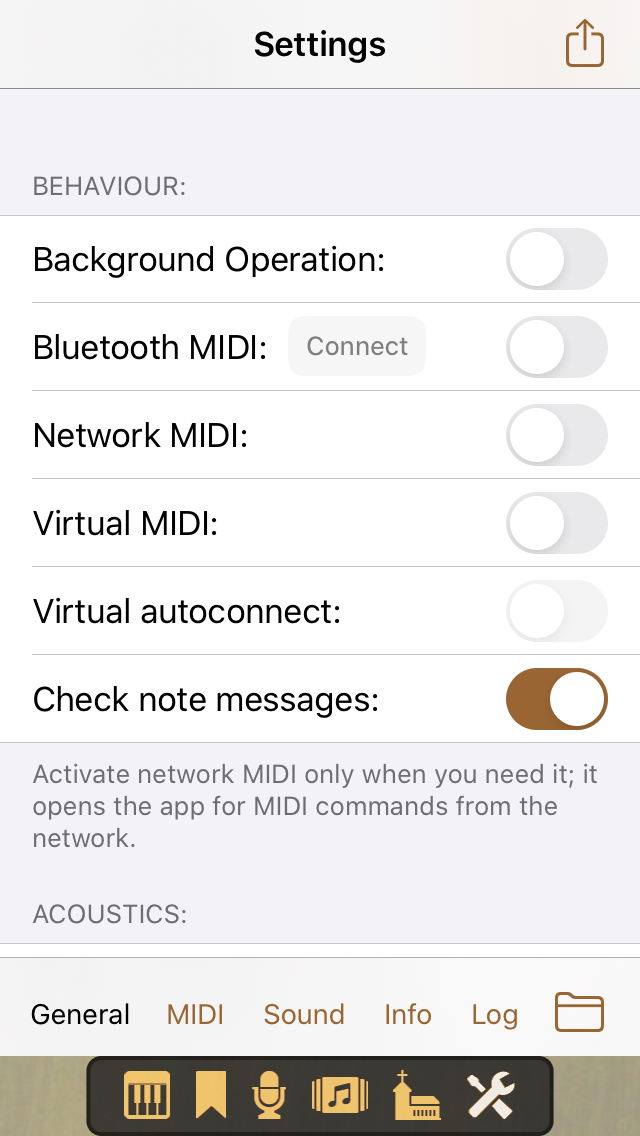
General – Behaviour ↑
These settings define the behaviour of the app concerning cooperation with the system and with other apps:
-
Background Operation: This switch is there only in the
iOS version. By default, a Napo app is suspended when you switch to
another app, i.e. its sound fades out and it stops processing MIDI
events. With this switch (or by long-pressing the settings icon in the
icon bar) you can configure the app to continue to run in the
background. For example, you can start another virtual instrument app
in the foreground and play both at the same time. Or activate
the Virtual MIDI switch also and start a virtual
keyboard or MIDI player app that can send MIDI data to the Napo app's
virtual MIDI channel. To save energy, do not allow background operation
if you don't need it, although, after 15 minutes of idle time (no pipe
voices are playing) in the background, the app deactivates its audio
session and as a consequence gets suspended by iOS. In this case you
have to bring the app to the foreground if you would like to continue
using it.
Starting with Napo 5.4, this switch has a meaning unter macOS also if a Launchpad is used. A Napo app responds to Launchpad commands only if it owns the main window or the background operation is enabled. -
Bluetooth MIDI: MIDI over Bluetooth is available only
for devices which support Bluetooth LE. Tap
the Connect button to select whether to advertise the
device via Bluetooth or to let the app scan for peripheral devices.
With MIDI over Bluetooth LE, establishing a connection works like this: Device A or an app running on device A offers a local MIDI service with a configurable name via Bluetooth. Device B or an app running on device B scans for such services and initiates the connection setup.
However, there are peripherals that cannot serve as device B, but solely as device A. Partly (e.g. MIDI Bluetooth adapters in the shape of a plug) such devices don't even have a user interface where it would be possible to select device A. In this case the Napo app has take the role of device B.
- Network MIDI: Napo can process MIDI commands received via RTP-MIDI. For example, you can connect a USB MIDI keyboard to a Mac and use the Audio-MIDI setup of macOS to create a session for routing the MIDI data to your iOS device. Do not turn on network MIDI if you don't need it. There could be a joker on your network who likes to unsettle you by remotely playing your organ app.
- Virtual MIDI: Virtual MIDI is a way to let other apps that run on the same device send MIDI data to your Napo app. When you activate this switch, the Napo app creates a virtual MIDI port named by the organ app. The other app could be a MIDI player, a virtual keyboard, or a chord generator app, for example. Activating virtual MIDI activates the Background Operation switch also.
- Virtual autoconnect: The usual proceeding for establishing a Virtual MIDI connection is that a sender app offers the option to select a receiver. Some sender apps do not support this. By setting the Virtual autoconnect option you advise Napo to automatically connect to all Virtual MIDI senders.
- Check note messages: This switch determines whether to check note messages for the requirement that every note-on message is followed by a corresponding note-off message before the next note-on message for the same note on the same channel follows, and vice versa. This should always be the case because the key of a keyboard instrument has to be released before it can be pressed again.
The effect of the switch is as following:
- On: When unexpected on/off sequences are received for a note and a channel, Napo creates a warning message in the log and ignores the unexpected command. For a sequence on-on-off-off, for example, a warning is displayed for the second "on". The following "off" deactivates the corresponding sound, and the second "off" gives another warning. This is the behaviour that was used up to Napo 4.19. It helps finding and inspecting problems in the MIDI setup, for example when the same channel is used by two keyboards or when the wiring is not reliable. An on-command which, for whatever reason, is missing its associated off-command, thus conforms in behaviour to a mechanical organ when a tone gets stuck: One simply hits the key once more to resolve the jamming, because the on-off sequence that is sent by this leads to a warning, but does also switch off the respective sound.
- Off: With this, the described message sequences are not treated as errors. Instead, Napo counts how often the note was switched on, and only after it was switched off the same number of times, the "off" will be processed. When a note-off command is lost, however, the situation can then not be cleared by hitting the corresponding key again, but Notes off must be tapped.
While it is wise to let the check stay active when playing manually, it might be useful to deactivate it for rendering MIDI files (as demonstrated in MarcMoerd app as MIDI player) because even MIDI files of organ and piano music can occasionally contain interleaved on-off commands.
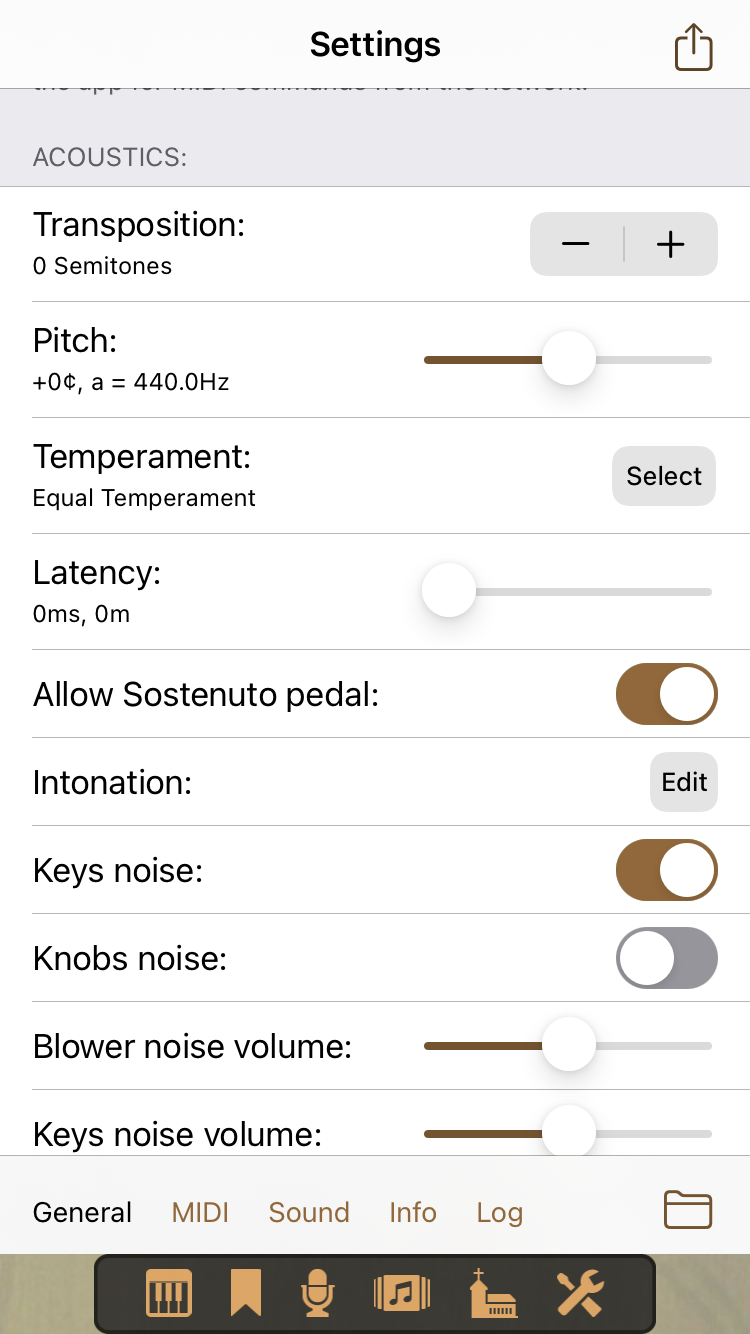
General – Acoustics ↑
These are settings related to tuning and similar topics:
|
|
- Transposition: You can use this option to transpose the incoming MIDI signals up or down by up to six semitones. This does not increase the tonal range of the organ. If, for example, the highest note of the organ is g4 and you transpose up by two semitones, then you will get this g4 note by pressing the f4 key, but you will get no sound by pressing the g4 key.
- Pitch: The pitch of the app depends on the sample set. Usually it is the unaltered pitch of the real organ. To adapt the sound of the app to other instruments, you can apply a pitch-shifting by up to +/- 100 cents. The pitch shifting is done by resampling with cubic interpolation. The slider allows a comfortable adjustment of the pitch with immediate acoustical feedback. To reset the pitch to 0 cents you can simply tap the + and then the - button of the transposition setting (or vice versa).
- Temperament: This entry is new in Napo 5.14. Temperaments are explained here.
- Latency: Here you can configure an additional, artificial latency, which is given in milliseconds and by the corresponding distance between the audio source and your ears. The effect is that the sound does not start when you press a key but only after the time that is specified here. The purpose of this setting is to allow you practising for pipe organs where the console is positioned at a large distance to the pipes. At a speed of sound of 340 m/s, 100 ms latency correspond to a distance of 34 m. Within the app, this functionality is realised by applying an artificial delay to the MIDI messages. The values displayed in the Latency line do not include the latencies that are added by MIDI, the audio system and the app's audio processing.
- Monophonic Bass: You see this switch only if the app includes monophonic bass functionality. Its intention is to let you play the pedal stops with the lowest pressed key of a MIDI keyboard if you don't have a MIDI pedal, to get a fuller sound. To achieve this, turn on monophonic bass and in the MIDI settings deselect all channels for the pedal (or at least the channels that are used by the manual).
-
Allow Sostenuto pedal (up to Napo 5.14): Napo supports
the use of Sostenuto pedals. However, there can be cases, for example
in a more complex MIDI setup with several instruments, where you do not
want this. So you can choose whether these pedals should be supported
or not.
New in Napo 5.15: While previously the Sustenuto function was supported only for MIDI controller 64, it now works for controller 66 as well, and besides that both controllers can be used to change combinations. For controller 64 and 66 there are now the following choices, respectively:
- Off: No sostenuto, no combinations.
- Sostenuto: Usage as sostenuto pedal.
- +Comb: Change to the next combination.
- -Comb: Change to the previous combination.
- +-Comb: At a short press (up to 1 second), change to the next, at a longer press change, to the previous combination.
When used for changing combinations, switching the stops happens when the pedal is released.
In Napo 5.18, the settings for MIDI controllers 64 and 66 have moved to section MIDI – Various. - Intonation: The buttons opens an editor where you can adjust the volume of each rank.
- Background noise: Here, starting with Napo 5.18, the volume of a soft background noise can be set, which will sound when the app does not create other audio. With this, amplifiers which turn off when they do not receive a signal for a certain time, can be kept alive.
- Use MIDI velocity for sound: If your MIDI keyboard sends key velocity data, then activate this switch to use the velocity to control then the volume of the pipes.
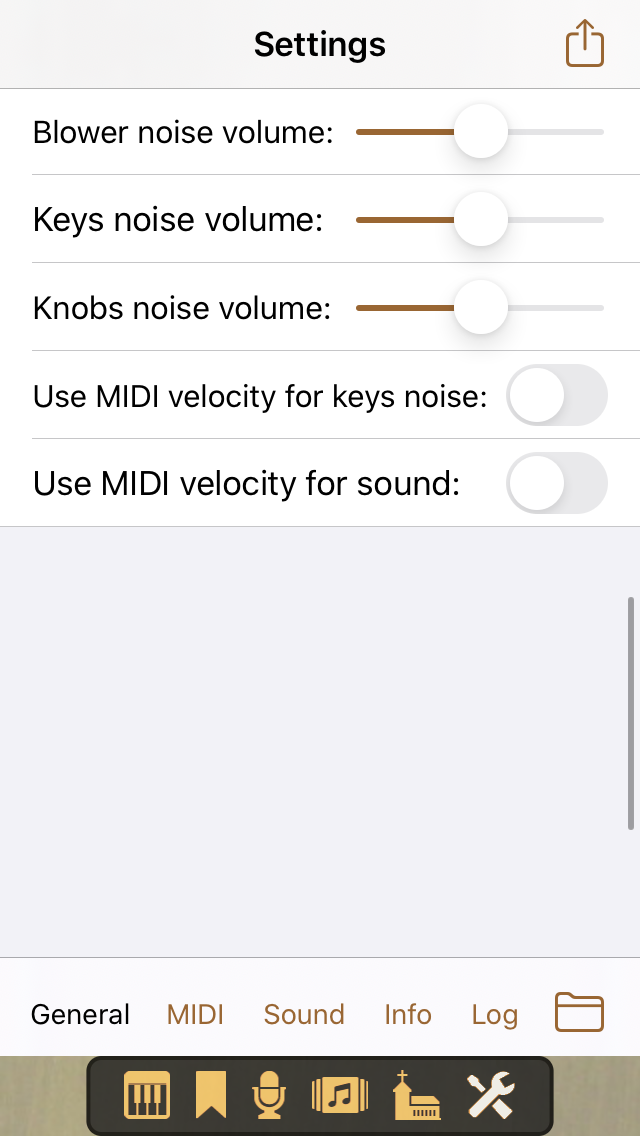
Finally there are some parameters that are visible only if the app contains the respective noise files:
- Keys noise and Knobs noise: Activate these switches to hear the respective sounds when you play. While the usefulness of the knobs noise may be questioned, the keys noise not just makes the sound more lively, it also improves the feeling of authenticity for the organist, in particular when playing with headphones.
- Blower noise volume, Keys noise volume and Knobs noise volume: These sliders allow you to set the volume of the respective sound.
- Use MIDI velocity for keys noise: If the app contains keys noise, and if your MIDI keyboard sends key velocity data, then with this switch you can advise the app to use the velocity data to control the level of the keys noise. Put simply: The harder you play the MIDI keys, the louder the virtual keys noise will be.
Many organ keyboards do not send velocity data at all. Even keyboards that do send velocity, mostly don't send release velocity. Release velocity is currently not used by Napo.
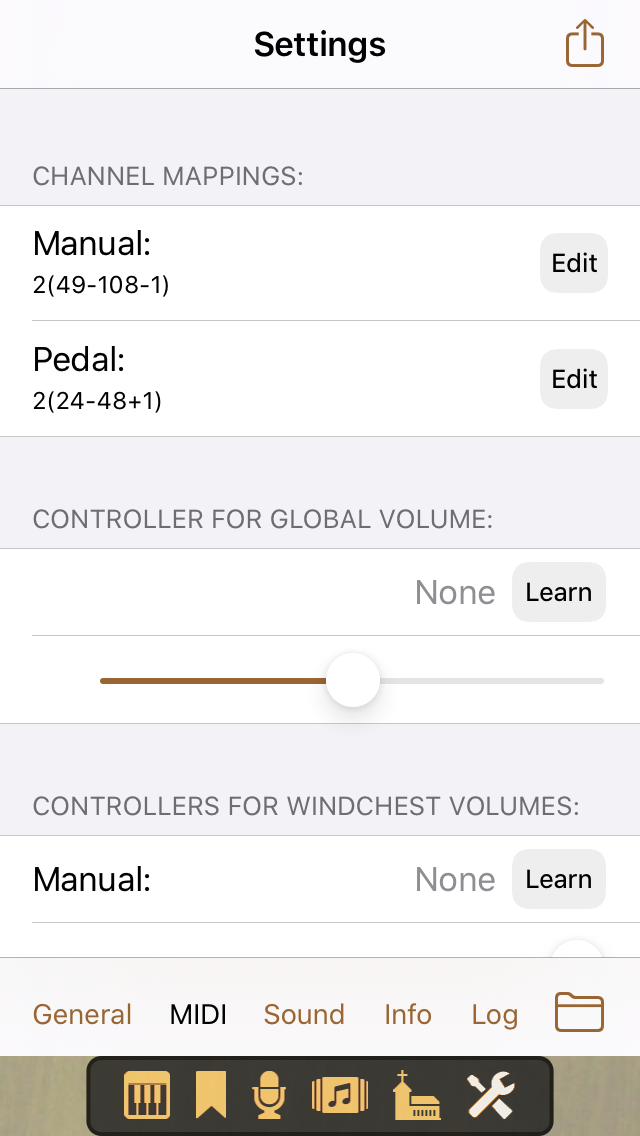
MIDI – Channel Mappings ↑
It is possible to map multiple MIDI channels to each of an organ's manuals, where every channel can be given a note range and an octave offset. Among other things, one can realise split functionality even with rather dumb MIDI keyboards that don't offer a splitting feature themselves.
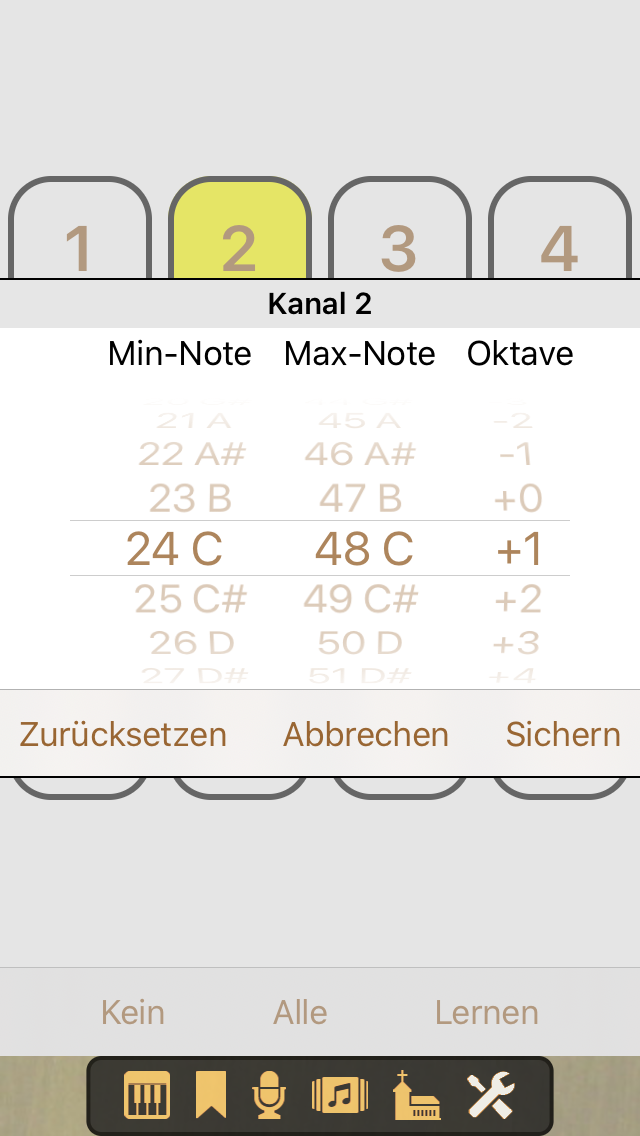
Suppose we have a MIDI keyboard with seven octaves that sends on channel 2 in the note range 24 - 108, and we would like to use the lowest two octaves to play PiteaMini's Pedal, leaving the upper five octaves for Manual. The lowest C key of an organ manual or pedal usually corresponds to MIDI note number 36. Thus, we need to map notes 24 - 48 to Pedal with an octave offset +1, and notes 49 - 108 to Manual with an octave offset -1. In the Settings view, these channel mappings look like following:
To create or change the mapping for a manual or pedal, tap the Edit button to the right of the name, and you will get to the MIDI mapping view for this manual resp. pedal:
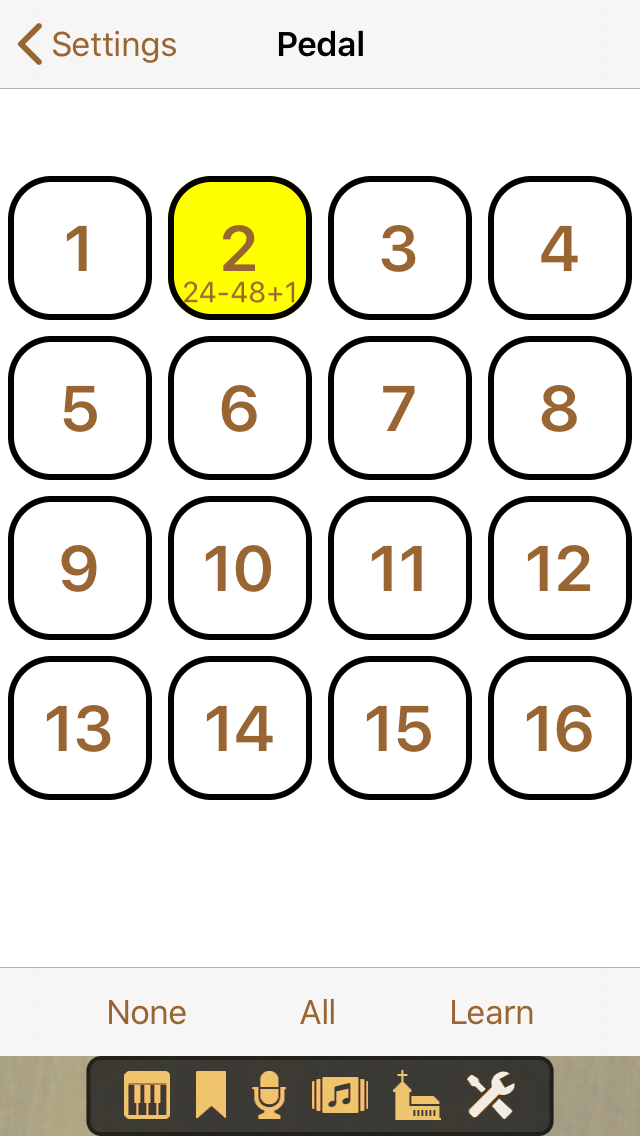
Each channel that is accepted by the current manual or pedal is emphasised by a yellow background color. If the note range is restricted or there is an octave offset, then the values are displayed below the channel number. There are two ways to configure the mapping. The simple way is to tap Learn and then press a key (or two keys at the same time to define a note range) on any MIDI keyboard that you would like to use for the current manual. Tap None to deactivate all and All to activate all channels.
The other way is to long-tap a channel button to get a picker view where you can choose a note range and an octave offset for this channel:
MIDI – Controllers for Volumes ↑
You can configure MIDI controllers for manipulating the global volume and the volumes of particular windchests:
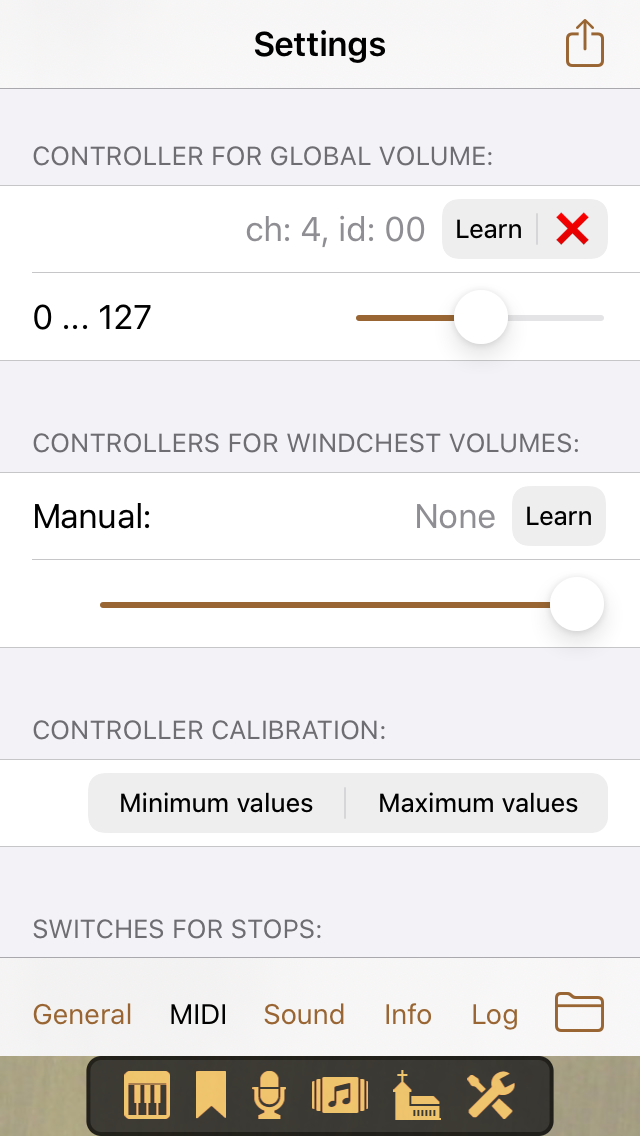
To do this, tap Learn and then move the MIDI controller, which usually is a volume slider or swell pedal. Tap x to remove a controller definition.
The sliders below the controller definitions give a visual feedback of the movements of the MIDI controllers. Of course you can also use these sliders to manipulate the volume settings. The first slider for the global volume is coupled to the volume slider of the Console view.
Starting with Napo 5.1, it is possible to calibrate controllers. This is because it can happen that a controller does not cover the full value range 0...127 but, for example, just 10...120. After tapping at Minimum values or Maximum values, respectively, in section Controller Calibartion and moving all configured controllers to the lower resp. upper end stop, the respective extremal values can be saved. Hereby, a minimum of at most 40 and a maximum of at least 90 is allowed. The value ranges of the controllers are displayed at the left of the sliders.
MIDI – Switches for Stops ↑
This section has one entry for each stop of the organ, where you can configure that the Console view's stop knob should respond to MIDI note-on or note-off messages:
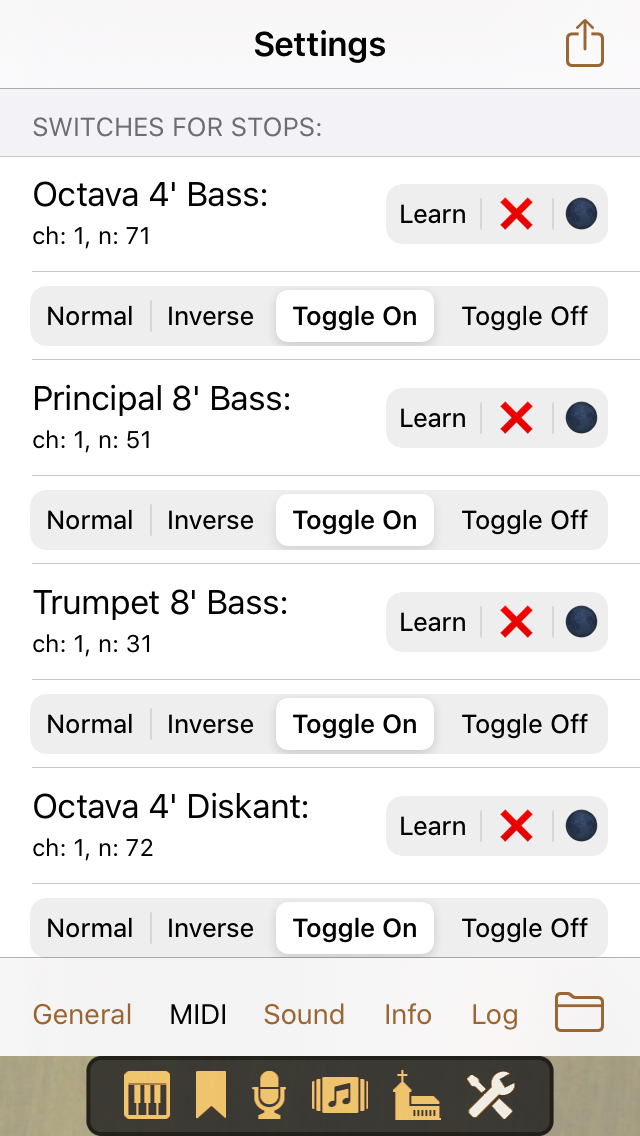
You do this by tapping Learn and then operating a button, key or switch at your MIDI keyboard or MIDI console which creates note-on or note-off messages. Tap the red x to remove a switch definition.
For each switch you can configure the mode of its operation. Normal means switch-on at note-on and switch-off at note-off. Inverse means switch-on at note-off and switch-off at note-on. Toggle at On means that the knob state is toggled by note-on messages, Toggle at Off means that the knob state is toggled by note-off messages,
You can also use MIDI program change messages to toggle stops. To configure this, tap Learn and then perform the program change that you would like to use for this stop.
Furthermore it is possible to drive lamps of stop switches, provided they response to the same note messages that are sent by the corresponding switches, which is for example the case with certain consoles of Hoffrichter and Pausch-e. To activate this control, tap the dark moon symbol to the right of the red x. It will then change to a bright sun symbol. By tapping again, the control for the corresponding stop can be turned off again.
MIDI – Switches for Couplers / Switches for Tremulants ↑
If the organ has couplers and tremulants, then there are sections to define switches for them. This works in the same way as the switches for stops.
MIDI – Buttons for Commands ↑
Here you can define that various commands can be triggered by MIDI note-on messages:

Learn and x have the usual meaning. Again, MIDI program change messages can be used as well, and driving lamps by note messages is supported.
MIDI – Various ↑
This section is there since Napo 5.18. It containts the settings for MIDI controllers 64 and 66 which previously were in sectio, die zuvor im Bereich General – Acoustics, and additionally a selection which defines the behaviour of the commands Previous combination and Next combination when the start resp. the end of a combination bank is reached. There are the following options:
- Stay: When a command for moving throuch the combinations would cross the borders of the bank, a message is shown, and the bank is kept.
- Circulate: Bei Vorige Kombination wird von der ersten Kombination der Bank zur letzten gewechselt, bei Nächste Kombination geht es von der letzten Kombination der Bank zur ersten.
- Switch: Hier wird zur letzten Kombination der vorherigen Bank bzw. zur ersten Kombination der nächsten Bank gewechselt.
MIDI – Buttons for Combination Banks / Buttons for Combinations ↑
In the same way you can use buttons or keys to select one of the first 16 combination banks or one of the first 16 combinations of the selected bank.
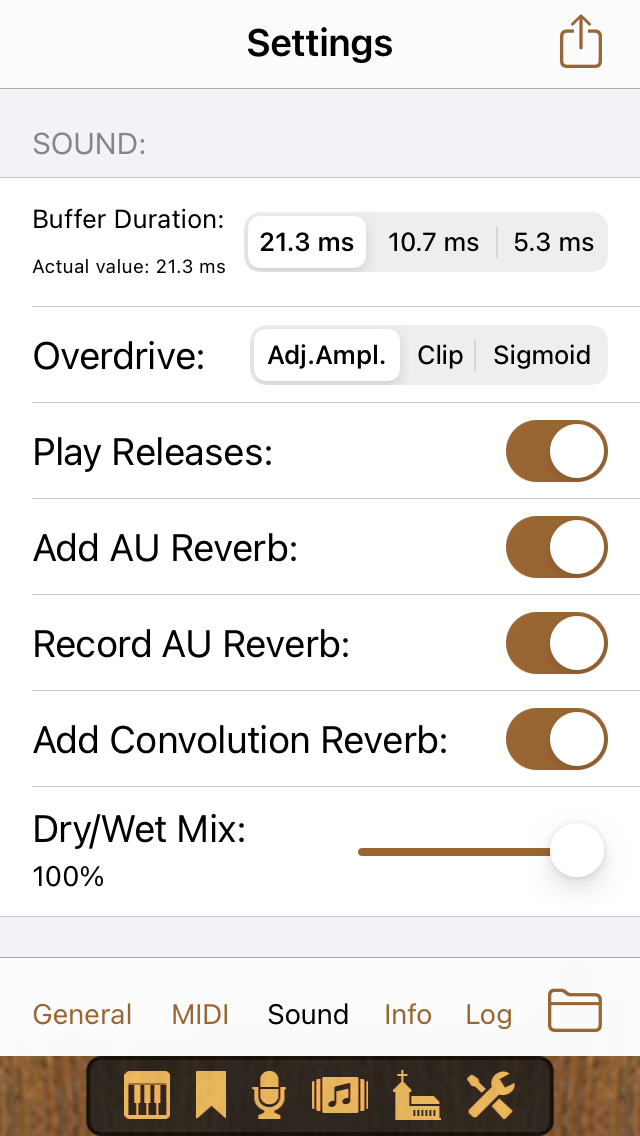
Sound ↑
-
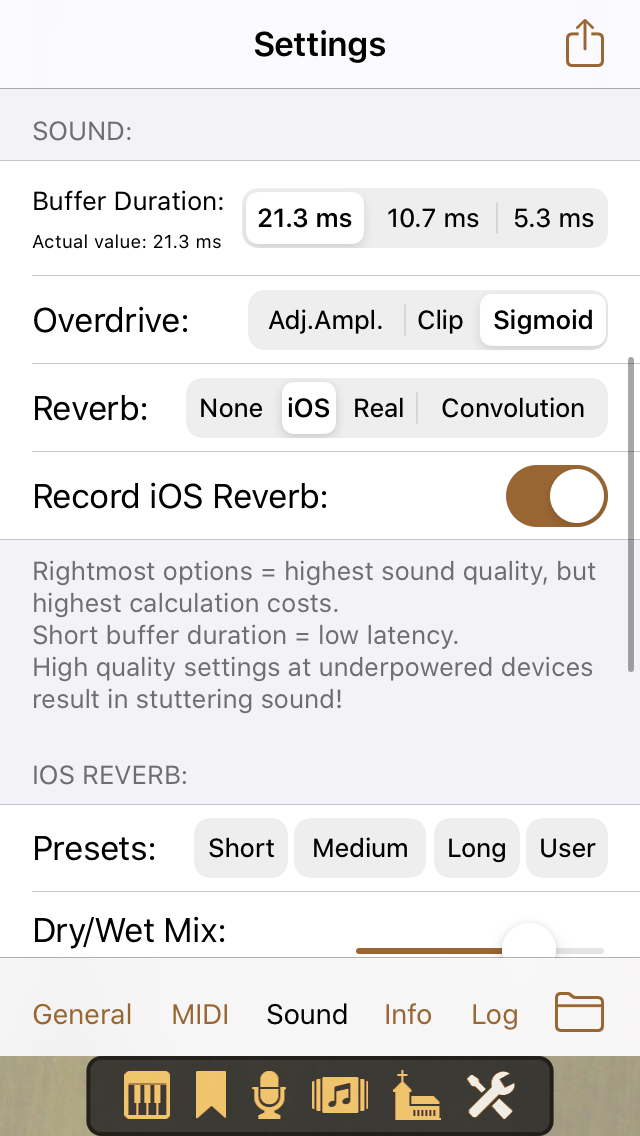
Buffer Duration: The buffer duration tells the
operating system in which time intervals it should ask the app for new
sound data and thus is a measure for how fast the app can react to your
playing. Usually 23.2 milliseconds (at 44.1kHz sample rate; 21.3
milliseconds at 48kHz) is a good enough value for organ playing.
However, if you feel that this gives too much latency or jitter, then
you can try 11.6 or 5.8 milliseconds. This increases the processing
load, in particular when convolution reverb is used.
Up to Napo 5.11, Napo's tone generator contained an additional internal buffer of 512 sample points, which made it somewhat useless to choose 5.8 milliseconds buffer duration. With Napo 5.12 this buffer was shortened to 256 sample points.
The actual buffer duration may differ from what you select, for example if you connect the Napo app to Audiobus. The actual buffer duration is displayed to the left of the selected buffer duration.
Starting with Napo 5.18, not the buffer duration can be selected anymore, but instead the buffer length, i.e. the number 1024, 512 or 256 of sample frames. For the harpsichord instruments, the values 128 and 64 are offered, too, and the mentioned internal buffer has 64 sample points as well. 64 sample points at a sample rate of 44.1kHz correspond to a buffer duration of 1.5 milliseconds. -
Overdrive: Some users don't like it when the app is
messing around with the general volume in overdrive situations, and
would rather prefer to hear some distortion. To please everybody, there
are the following choices:
- Adj.Ampl.: Adjusting the amplification is the default behaviour. When an overdrive happens, the app will reduce the volume. You see the volume slider in the Console view move downwards.
- Clip: With this setting, the app does not do any overdrive prevention. The signal is just clipped, and you will hear distorted sound.
- Sigmoid: As a compromise, this option applies a sigmoid transform to the signal. This does not help at heavy overdrive, but it can remove the distortion in not-so-heavy cases. As the transform is applied always, you would think that the benefit comes with the cost of an altered sound even when the signal is not overdriven. But this is not the case – you won't hear a difference for normal signal values.
- Reverb up to Napo 5.10: The default setting is iOS, which cuts off the release part of the sample files and lets iOS resp. macOS create the reverb. Real plays the samples including their release part, which needs more processing power. (The notation Real is a bit misleading, as the samples could contain artifical reverb themselves.) You can turn reverb off (setting None) if you would like to use an external effect unit or if you are playing in a large room with its natural reverb. Another option is to use Napo's convolution reverb.
- Reverb starting with Napo 5.11: Using the switch Play Releases it can now be configured whether the release parts of the samples should be rendered, independently of the addition of reverb. As the releases do not only contain eventual room reverb but also decay sounds of the pipes, this can increase the fidelity of the rendering in particular for samples that don't have much reverb and that you want to add artificial reverb to. Furthermore, the settings for AU Reverb (AudioUnit reverb, previously called iOS Reverb) and Convolution Reverb are now independent of each other. Hence, both kinds of reverb can as well be combined.
Sound – iOS Reverb / AU Reverb ↑
When you select iOS Reverb or, starting with Napo 5.11, AU Reverb, you can either use one of the presets Short, Medium or Long, or you set the parameters of the reverb unit manually. There are seven of them, which can be controlled by sliders:
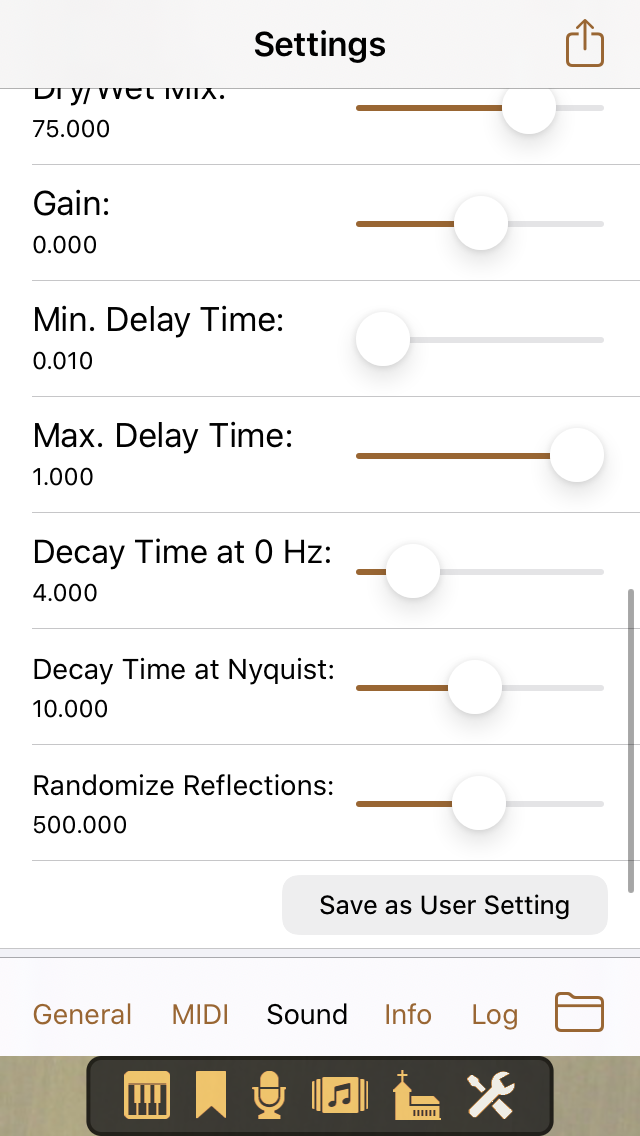
You can save the current parameters as a User Setting and later recall it by tapping User. Beware: by choosing unsuitable values you can get deformed sound that reminds more of an overdriven drawbar organ than a pipe organ. We don't feel liable if you damage your ears or speakers or the nerves of your neighbours.
When you create a recording of your organ playing with the app's internal audio recorder, the reverb is normally included. However, there is the option to deactivate the recording of iOS reverb, which makes it possible to play with reverb but record without reverb and add reverb later with any audio software of your choice. The behaviour is controlled by the switch Record iOS Reverb / Record AU Reverb.
Sound – Convolution Reverb ↑
When you select Convolution Reverb, you see a list of available impulse responses:
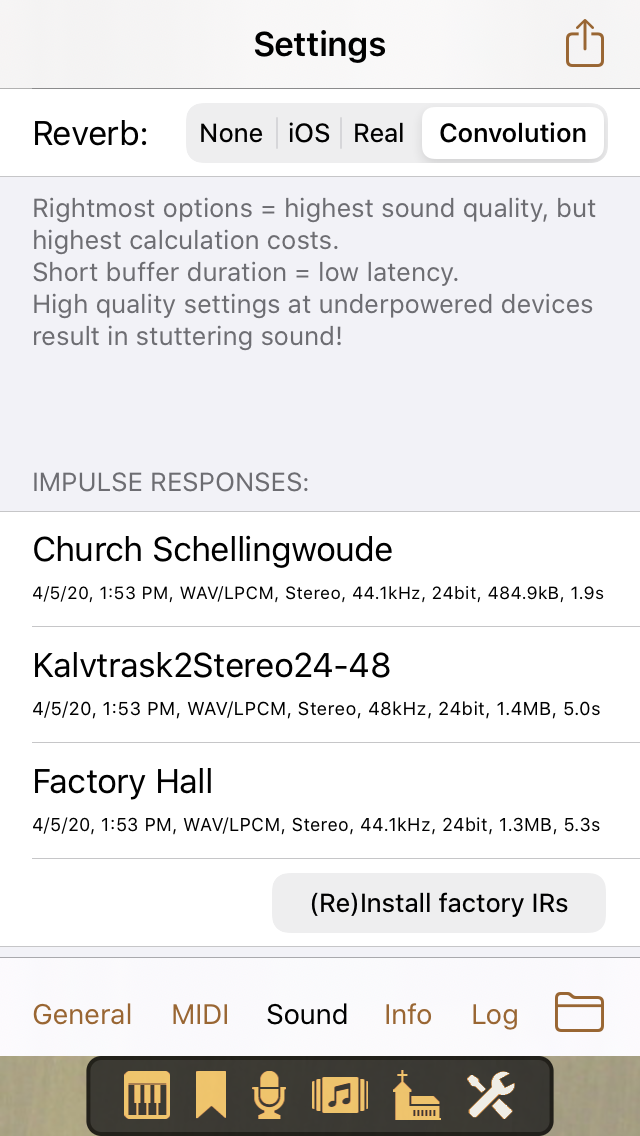
These can be factory impulse responses that are included with the app, or impulse responses that you uploaded to the app (this functionality is part of the Recordings view). Impulse responses can be renamed or deleted. Long-tap/click an impulse response name to do this. Starting with Napo 5.3, the impulse responses are shared by all Napo apps, so be aware of the fact that you delete an IR from all apps if you delete it in one app.
You can reinstall the factory impulse responses anytime by tapping the button (Re)install factory IRs. This button is visible only if the app does in fact contain factory IRs.
Starting with Napo 5.3 on macOS, there is an additional button Show IR library in Finder. This makes it easy to use Finder for managing the shared impulse responses. On iOS you can use the Thafknar app for this purpose. Napo's impulse reponse library is the IR set named "Napo" in Thafknar.
Starting with Napo 5.9, there is a Dry/Wet Mix slider for mixing the original and the reverberated signals. The default setting 100% corresponds to the behaviour in earlier versions, i.e. fully reverberated sound.
Besides Stereo convolutions with a single Stereo impulse response, Napo supports 'Quad' convolutions with a pair of Stereo impulse responses. The first ist also known as "Parallel Stereo", the second as "True Stereo" convolution. For the Quad mode one of the impulse responses of a pair of files named like "Church L.wav" und "Church R.wav" must be selected. For more details see here.
It must be clearly said that only devices like iPad 4 or iPhone 5 or better are fast enough to cope with reasonable reverb lengths.
Info ↑
This view shows information about disk space and sample files.
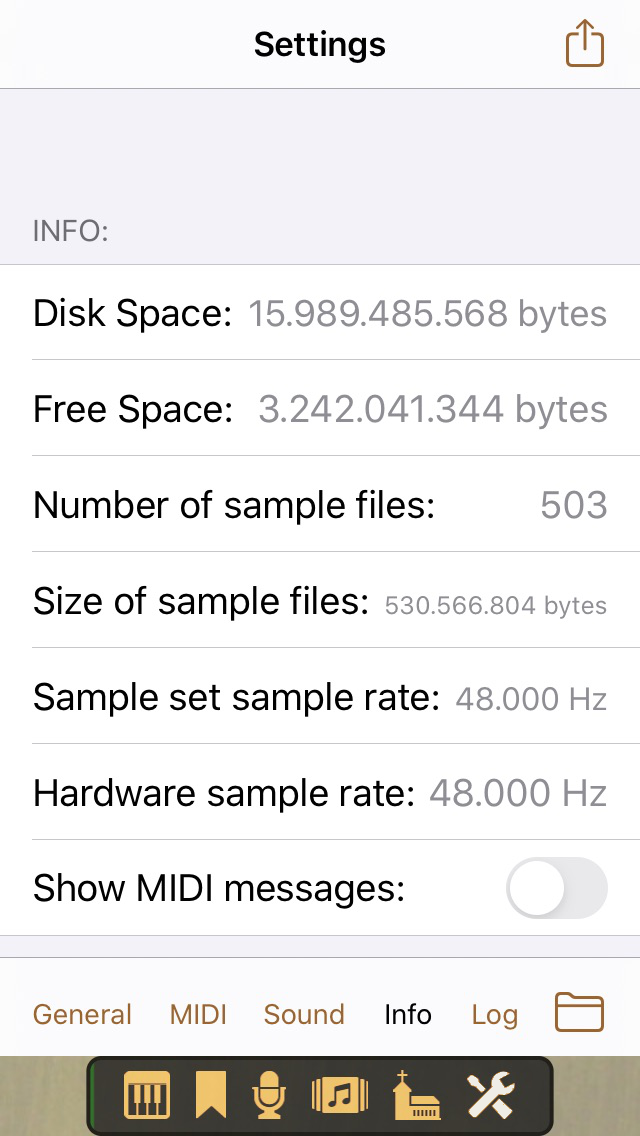
The displayed values are:
- Disk space: This is the total size of your SSD.
- Free space: This is the free space of your SSD.
- Number of sample files and Size of sample files: The number and total size of WAV files of the sample set. In Napo 5.9 these entries are replaced by a single entry File Statistics which is explained here.
- Sample set sample rate: The sample rate of the sound files of the sample set.
- Hardware sample rate: The current sample rate of the audio hardware.
Turning on Show MIDI messages effects that MIDI messages are noted in the log. This may help investigating MIDI problems.
Save/Load ↑
In this view you can save or load the current settings. For example, you can create settings for various consoles or environments:
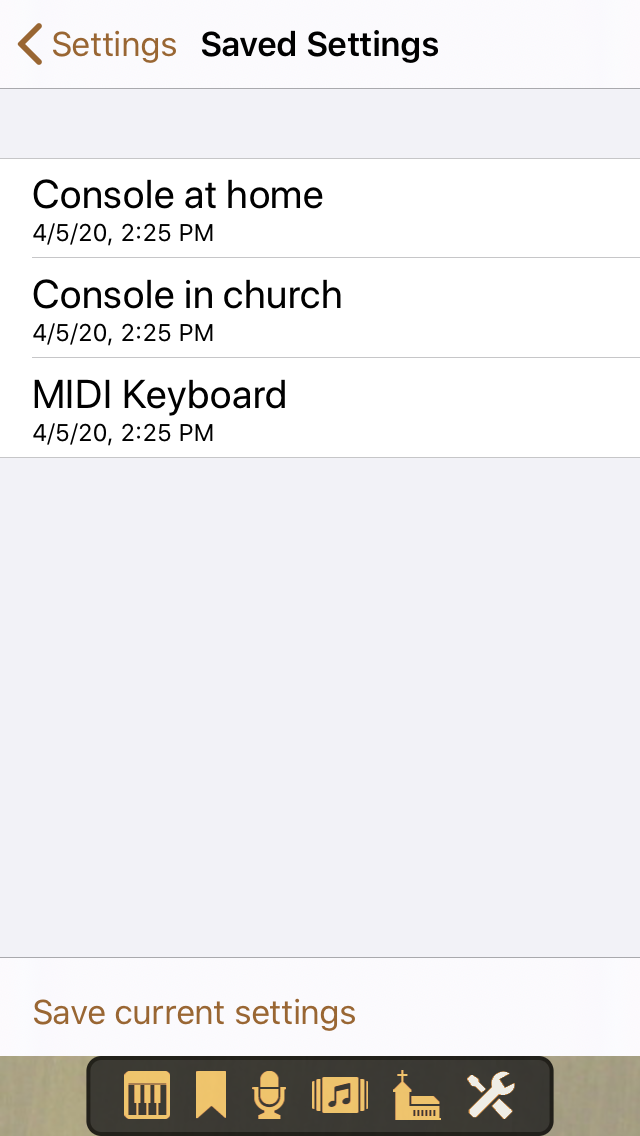
The list shows the settings sets that you have saved, with the time at which they were saved. A settings set contains all parameter values of the four parameter views. It is not possible to save only a subset of the parameters. Saving the current settings is done by tapping Save current settings and entering a name. When you long-tap a settings set, you get an context menu by which you can load, duplicate, rename or delete the set. Deleting can also be done by swiping. Beware: Loading overwrites all your current settings.
Like it was described for recordings, saved settings can as well be stored in iCloud.