| Return to the Thafknar Support Page | Return to the Thafknar User Manual |
The Settings View
In this view you can set some parameters that control the operation of the app:

- After startup show tells if the app, when started from scratch, will show the Recorder view, the Files view, the Parameters or the User Presets view. This makes sense if you work mainly with one of these views.
- At memory warning controls the behaviour of the app when it is receiving an iOS notification because of a low memory condition. The safe setting is deactivate convolution reverb. This frees up memory and is supposed to keep iOS happy. If you choose show warning instead, then the app shows a warning, but does not release memory. You may have luck, but just as well iOS may terminate the app.
- After finishing a recording is for configuring the behaviour of the app when you tap the Finish button in the Recorder view. With stay at recorder, the app stays at the Recorder view so you can immediately do more recording work, while show file changes to the Files view and selects the recording. The latter option works only when you do not automatically move recordings to iCloud Drive, see below.
- After cancelling a recording determines whether the files of cancelled recordings will be deleted or kept and displayed in the Cancelled recordings section of the Files view.
- Save new recordings is new in Thafknar 8.3. With on device it lets you save new recordings in the app's documents directory, while on iCloud will automatically move the files to iCloud Drive.
- Recorder buttons: and allows you to select between the puristic recorder GUI single button, which has only one button for starting and finishing a recording, and the multi button mode of earlier versions, which has buttons for starting, finishing, pausing / resuming and cancelling.
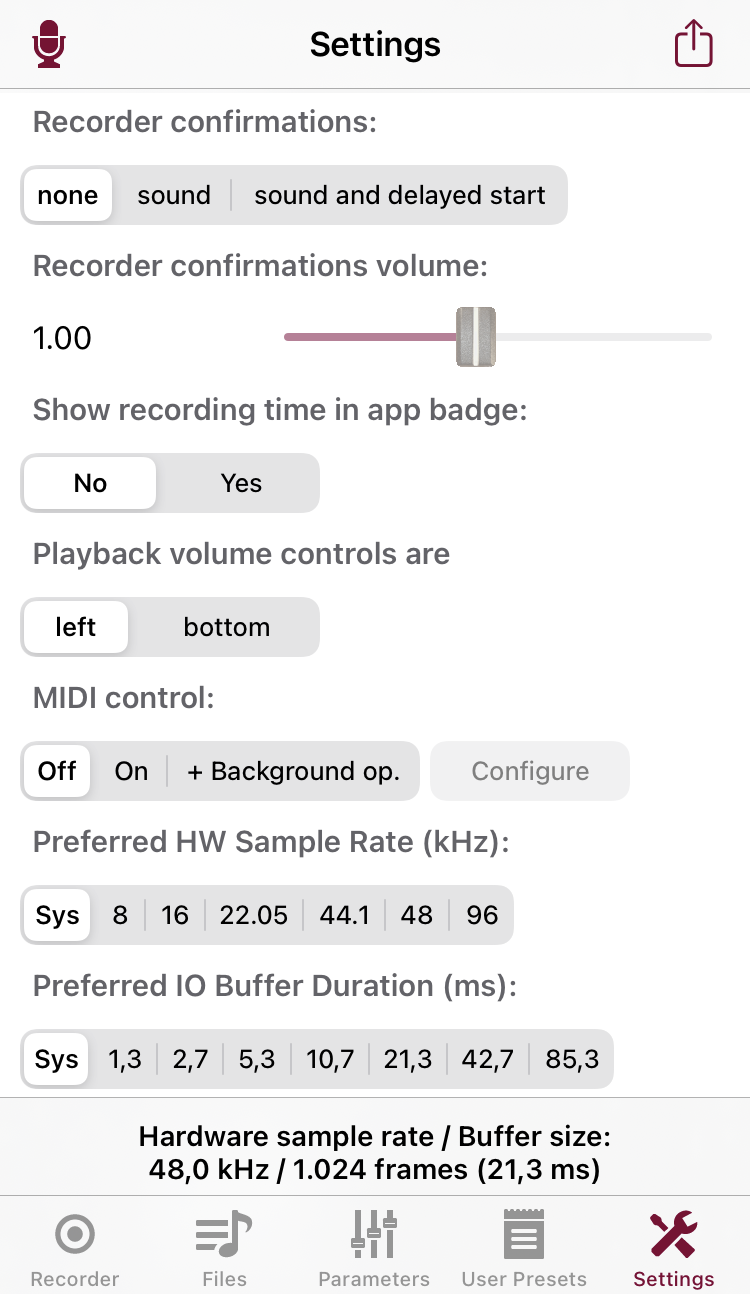
- Recorder confirmations: lets you add acoustic confirmation sounds to the recorder buttons. These help operating the recorder without looking at the screen. However, if you do not use headphones, then you will also record the start sound at the beginning of the recording. Because of this, there is the option sound and delayed start. This adds a short delay before the recording starts and is usually sufficient to omit the start sound – unless you have turned on reverb, or if your recording room itself has significant reverb.
- Recorder confirmations volume: lets you adapt the volume level of the recorder confirmations.
- Show recording time in app badge: is new in Thafknar 7.11 and lets the app show the number of elapsed seconds during a recording as an app badge. For this you need to grant the app permission, which can be done when first activating the option or later in the iOS settings, section Notifications.
- Playback volume controls are is for choosing the location of the volume slider and the volume-off and volume-high buttons, which are shown in the Files view whenever an audio file or a cancelled recording is selected.
- MIDI control: Here you can enable MIDI control if you have performed the corresponding in-app purchase. Apart from the modes Off and On there is a mode + Background op. which has the additional effect that the app is kept active when you send it to the background. Use this option with care because it puts additional strain to the battery. When MIDI is enabled, tap the Configure button for defining the details of the MIDI control functionality, see MIDI control.
- Preferred HW Sample Rate (kHz): Here you can set the preferred hardware sample rate. Whether iOS will fulfill your wish depends not only on the capabilities of the hardware but also on the behaviour of other apps that are running. When another app has requested a different sample rate, iOS may deny your request. You can see the actual hardware sample rate at the bottom of the view.
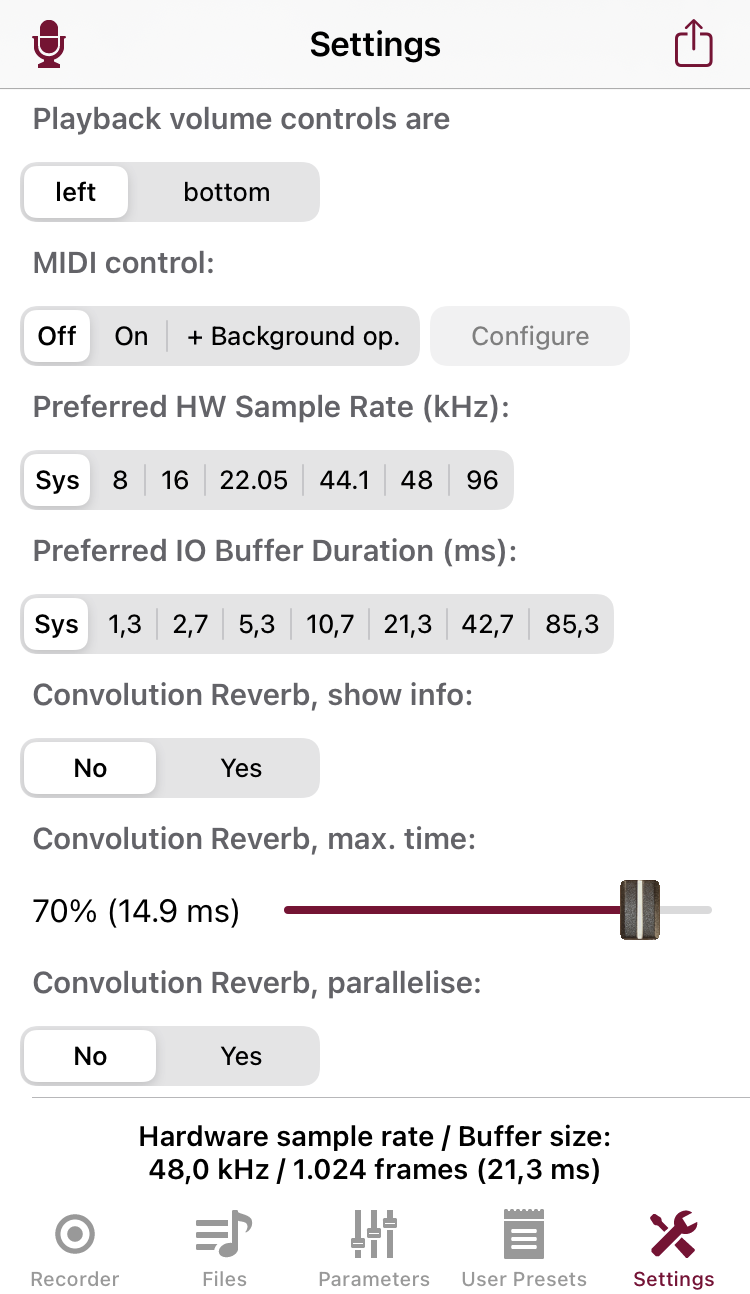
- Preferred IO Buffer Duration (ms): Here you can give iOS a hint about your preferred IO buffer duration. Again, depending on the capabilities of the hardware and the needs of other apps, iOS may or may not respect this preference. You can see the actual IO buffer duration at the bottom of the view.
- Convolution Reverb, show info: Here you can select whether the convolution time in milliseconds should be displayed at the icon of the Parameters view. The time is displayed only if convolution reverb is activated. In Thafknar 8.0 and later, the convolution buffer size is shown, too.
- Convolution Reverb, max. time: allows you to limit the time that is permitted for completing the convolution. It is given in percent of the buffer duration, the default being 80%. Choose a smaller value if you are using Thafknar in an Audiobus setup and notice dropouts of the sound because of a high system load or because another app in the audio chain needs more time. In case of a timeout, the convolution processing will be terminated prematurely, and only a part of the impulse response will be used. This is signalled to the user by the timeout warning flag.
- Convolution Reverb, parallelise: is for using several CPU threads for calculating the convolution reverb. It makes sense only for Quad convolutions with long IRs.
Keep the value Sys for the preferred hardware sample rate and for the preferred IO buffer duration if you do not want to change the system's current settings. It is also better to keep the Sys values if you would like to use the app with Audiobus or Inter-App audio. For example, if you start Thafknar before Audiobus, set the preferred hardware sample rate to a value different from 44.1 kHz, start a file playback or activate playthrough in Thafknar and then start Audiobus, then Audiobus will fail to connect to Thafknar.
For the preferred IO buffer duration use a value that corresponds to 1024 or even 2048 or 4096 frames when latency is not an issue. Use smaller values when you need fast response. This reduces the latency but means higher computational demand. The sound may drop out if your device is not fast enough.
At the bottom of the view you see the current hardware sample rate (in Hertz) and buffer size (in frames and in milliseconds). This sample rate and buffer size, usually 44100 Hz and 1024 frames, is used by iOS when it asks the app for audio data, hence for playing audio files and for the playthrough mode. Some apps, like Audiobus or GarageBand, change this to 512 or even 256 frames. Again, low buffer sizes can lead to stuttering sound, even if you don't actually use Thafknar with Audiobus or with GarageBand or other IAA-capable apps.
At the top of the view there is an action button. The action menu offers the options to display a short info about the app, to view the available in-app purchases, and to open the app support page in Safari. Furthermore there is an option to display the app's log, which collects up to 10 of the latest messages of the MIDI system as well as messages related to in-app purchases. You can close the log display by tapping it. In normal operation, the log display is opened automatically whenever a new entry is added (e.g. when you connect a MIDI device) and closed automatically shortly after.
Furthermore, there is a menu entry Edit Access Rights. This takes you to the iOS settings page where you can edit the permission of the app to access the camera (for taking images for preset buttons), the microphone (for recording and playthrough), the media library (for importing audio files) and the photo library (for importing photos as images for preset buttons).